A cable entry can look like a small detail: a metal fitting, a locknut, and a cable passing through an enclosure. In a hazardous area, however, that detail helps preserve the equipment’s certified protection. The right Explosion Proof Cable Gland must match the enclosure, cable construction, hazardous-area classification, and installation method. A gland that fits the thread but grips the wrong cable diameter is not a sound choice.
The risk is not theoretical. NFPA’s report, “Fires in Industrial and Manufacturing Properties,” estimated 37,910 U.S. fires in these properties each year from 2011 to 2015, with an average of 16 civilian deaths and $1.2 billion in direct property damage annually. These figures do not isolate cable-gland failures, and they should not be read as doing so. They do show why equipment details deserve careful review. IEC 60079-14 also provides installation guidance for electrical systems in explosive atmospheres; installers should check the applicable edition and project requirements.
Choosing a gland takes more than matching a thread. Confirm the protection concept, gas or dust classification, cable type and outside diameter, ingress protection, temperature range, and gland material. Then review the manufacturer’s certificate and installation instructions. Small details matter. A field measurement, such as the cable’s actual diameter, can catch a mismatch before installation. Still, no checklist replaces competent engineering review, and product documents can be easy to misread. The following seven tips offer a practical starting point—not a substitute for site-specific assessment.
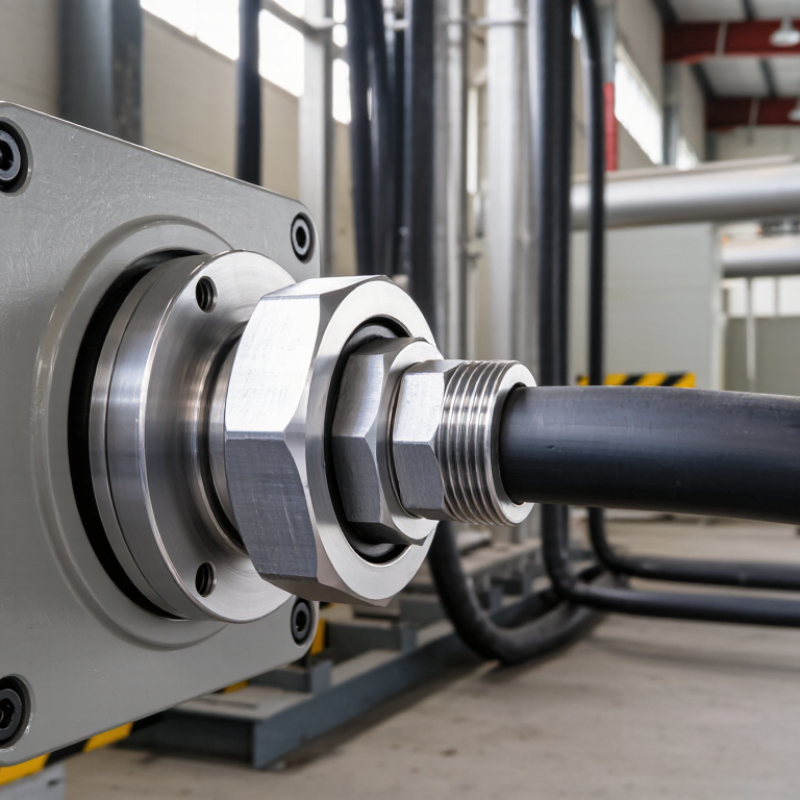
Before selecting an explosion-proof cable gland, classify the exact location and the conditions it faces. IEC 60079-10-1 provides guidance for classifying areas with flammable gas or vapor; IEC 60079-10-2 covers combustible dust. The distinction matters: a gas-zone rating does not automatically suit a dust zone. The U.S. Chemical Safety Board’s 2006 Combustible Dust Hazard Study recorded 281 incidents, 119 deaths, and 718 injuries between 1980 and 2005. These figures show why dust hazards and their locations deserve careful assessment, not guesswork.
Small details matter. Confirm the zone, gas or dust group, required equipment protection level, and temperature limits against the site’s hazardous-area documentation. Then check ambient temperature, moisture, salt, chemicals, vibration, and cleaning methods. A gland beside a hot pump may need a different temperature rating from one in a cool control room. Match the gland’s sealing range to the cable’s actual outside diameter, and verify armor compatibility where applicable. A drawing may look complete, yet the installed cable jacket can differ slightly. Measure it. Do not guess. Keep the selected gland’s marking and installation instructions available for inspection, and have a qualified electrical professional verify the match before installation.
Choosing an explosion-proof cable gland starts with the equipment’s actual certification and hazardous-area classification. Match the gland’s protection concept, gas or dust group, zone or division, and temperature rating to the enclosure and site documents. IECEx or ATEX certificates may apply in some markets; local rules and project specifications still determine what is acceptable. Check the certificate’s scope, not just its number. It should cover the gland type, cable construction, and installation conditions you intend to use.
Tip: Compare the certificate with the equipment schedule. Confirm thread form and size, cable diameter, armor requirements, and ingress-protection rating. Check whether the seal suits the cable’s outer sheath and the enclosure entry. A certified gland can still be unsuitable when fitted to a mismatched cable or thread. Small details matter.
The risk context is serious. The U.S. Chemical Safety Board’s 2006 Combustible Dust Hazard Study documented 281 fires and explosions from 1980 to 2005, resulting in 119 fatalities and 718 injuries. Those figures cover combustible-dust incidents, not cable-gland failures, but they show why area classification and correct equipment selection deserve careful review. Keep the certificate and installation instructions with the project records. If the documents leave a requirement unclear, pause and verify it with a qualified hazardous-area professional.
Check certification and explosion protection requirements before selecting a cable gland.
How to read this chart: Each bar represents one item to verify; 1 means the check applies. This is a selection checklist, not survey data.
Tip: Measure the cable’s actual outside diameter. A gland’s clamping range must cover that measurement, including any sheath variation. A loose fit can weaken sealing; an over-tightened fit may damage the jacket. Match the gland to the cable’s construction too: armored, braided, and unarmored cables need different clamping and bonding arrangements. IEC 60079-14 provides installation guidance for equipment in explosive atmospheres.
Tip: Check the cable datasheet, then compare its diameter with the gland’s certified range. Do not rely on a nominal cable size alone. Outer jackets, armor, and manufacturing tolerances can change the finished diameter. A caliper gives a more useful check at the installation point. Small mismatch, big risk.
IEC 60529 defines IP ratings used to describe protection against dust and water. For example, IP66 indicates dust-tight protection and resistance to powerful water jets under standardized tests; it does not, by itself, prove explosion protection. Verify the gland’s Ex certification and permitted cable types for the intended application. If the cable specification is unclear, pause and confirm it with the supplier or project engineer. That extra check can feel slow, but guessing is worse.
Material choice starts with the enclosure, cable, and actual site conditions. A nickel-plated brass gland may suit many indoor installations, while stainless steel can better resist salt spray or frequent washdowns. In acidic or alkaline areas, check chemical compatibility rather than relying on material names alone. Small details matter. A seal that swells, cracks, or hardens can compromise the cable entry over time.
Check the cable’s outer diameter and construction against the gland’s sealing range. A seal that is too loose may not grip; one that is over-compressed can damage the cable jacket. For flexible or armoured cable, choose a gland designed for that cable type and its mechanical demands. I have seen selection decisions focus on the metal body while overlooking the seal material. That is easy to miss.
Match the gland’s ingress protection and temperature range to the installation, including dust, rain, vibration, and nearby heat sources. UV exposure can age some polymers faster than expected. Not always. Confirm that the gland’s markings and installation method are suitable for the equipment and location, and follow the equipment documentation. A good choice on paper can still fail if the thread is mismatched or the locknut is left loose. Recheck the finished entry after installation.
Before fitting an explosion proof cable gland, confirm the cable’s outside diameter, construction, and entry thread against the gland documentation. A mismatch can leave the seal loose or damage the cable jacket. Check that the enclosure entry is clean, undamaged, and correctly threaded. Small metal burrs matter. Installation should follow the equipment instructions and be handled by trained personnel. Do not guess a tightening torque; use the specified value and suitable tools.
Tip: Check the seal, not just the nut. Make sure the gasket or sealing ring sits flat, the cable enters straight, and the gland grips the cable without crushing it. Keep the required thread engagement. One detail is easy to overlook: cable movement after installation can loosen a fitting, especially near vibrating equipment.
After installation, inspect the entry for gaps, shifted seals, or visible cable damage. Record the gland type, cable details, and inspection date so future checks are practical. Set maintenance intervals using the equipment instructions, site conditions, and exposure to heat, dust, moisture, or vibration. During maintenance, look for corrosion, cracks, and loosened parts; replace damaged seals with specified components. A quick visual check helps, but it cannot confirm every internal condition. If the fit or seal is uncertain, pause and have a qualified technician assess it rather than adding improvised sealant.
Measure the cable’s actual outside diameter with a caliper. Compare it with the gland’s certified clamping range. Small mismatch, big risk.
No. The jacket, armor, and manufacturing tolerances can change the finished diameter. Check the cable datasheet and measure the cable at the installation point.
Not always. Armored, braided, and unarmored cables can need different clamping and bonding arrangements. Confirm the permitted cable construction in the gland documentation.
No. IP ratings describe protection against dust and water under standardized tests. Check the gland’s Ex certification and its permitted applications separately.
Confirm the cable diameter, construction, and entry thread. Make sure the enclosure opening is clean, undamaged, and correctly threaded. Even small metal burrs matter.
Check that the sealing ring sits flat and the cable enters straight. The gland should grip without crushing the jacket. I still find the seal easy to overlook.
No. Use the specified torque, suitable tools, and equipment instructions. Installation should be handled by trained personnel.
Check for gaps, shifted seals, cable damage, corrosion, cracks, and loosened parts. Record the gland type, cable details, and inspection date. A visual check cannot reveal everything.
Pause and ask a qualified technician to assess it. Do not add improvised sealant; it may hide the real problem.
Choosing the right Explosion Proof Cable Gland starts with understanding the hazardous area and the conditions it must withstand, including temperature, moisture, dust, and potential exposure to corrosive substances. Check that the gland’s certification and protection rating meet the requirements for the intended installation. Then match its design and size to the cable type, diameter, and construction so the cable is properly secured without compromising the enclosure’s protection.
Material selection and environmental sealing are also essential. Choose materials suited to the surroundings and verify that the gland provides appropriate resistance to water, dust, and other expected conditions. Before installation, confirm that the cable entry, seals, and connection method are compatible with the equipment. Follow the manufacturer’s instructions, inspect the installation for secure fit and effective sealing, and plan regular checks to identify wear or damage. These steps help support reliable operation and long-term protection.

Hongxiang